Эта заметка - продолжение публикации Запуск и остановка Azure серверов по расписанию v2. В ней рассказывается о скрипте, который проверяет состояние серверов и отправляет письма об ошибках запуска виртуальных машин администраторам системы, что им необходимо подключиться к порталу Azure и проконтролировать процесс.
Предпосылкой к созданию скрипта проверки стала нестабильность облака Azure, а конкретно то, что команды на включение виртуальных машин могут не исполняться ввиду физической ограниченности ресурсов в датацентрах Azure ("The hardware cluster where the VM is currently deployed did not have enough capacity..."), о чем я писал в предыдущей заметке.
В этом скрипте используется новый модуль взаимодействия PowerShell с облаком Azure, поэтому я расскажу более подробно, как создать новую учетную запись автоматизации. Уже имеющуюся учетную запись автоматизации из скриптов запуска-остановки виртуальных машин использовать без обновления модулей нельзя, а обновлять модули нельзя, так как в скриптах используются старые команды.
- Запуск сервиса через 30 минут от команды на запуск серверов - каждый час.
- Вход в подписку от имени сервисной учетной записи.
- Сканирование всех виртуальных машин в указанном регионею.
- Поиск тегов "Schedule Start" у которых значение равно текущему часу (те же самые метки, которые используются для скрипта запуска серверов).
- Проверка у найденных объектов тега "Schedule Days", если в нем есть текущий день недели, или тег "Schedule Days" отсутствует вообще (разрешены все дни недели).
- Проверка состояния найденных виртуальных машин (запущены ли).
- Запуск отфильтрованных виртуальных машин.
- Запись выполненного действия в тег "Comment" для каждого обработанного объекта.
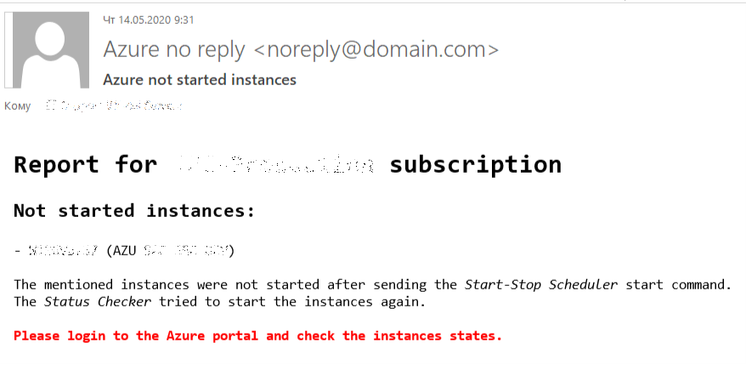
- Отправка письма администраторам сервиса о найденных незапущенных серверах, что необходимо проконтролировать их.
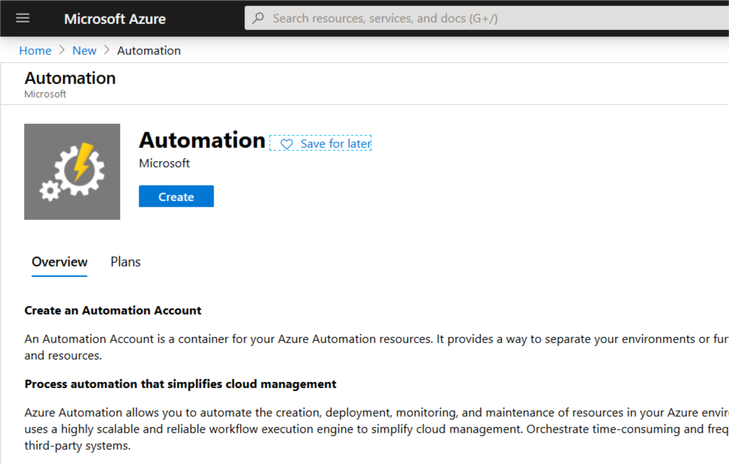
Для запуска задания от сервисной учетной записи необходимо создать объект типа Automation Account. В моем примере он будет называться aac-Infrastructure.
Итак, необходимо создать новый объект Automation.
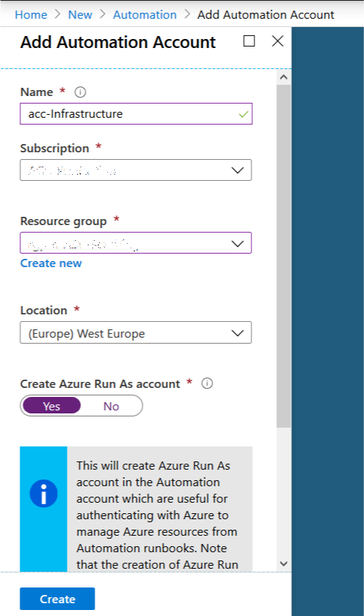
Ввести название, например aac-Infrastructure, подписку, ресурсную группу, датацентр (локацию) и выбрать создание учетной записи Azure Run As account.
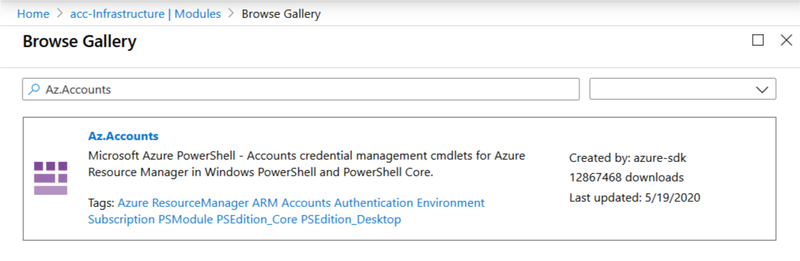
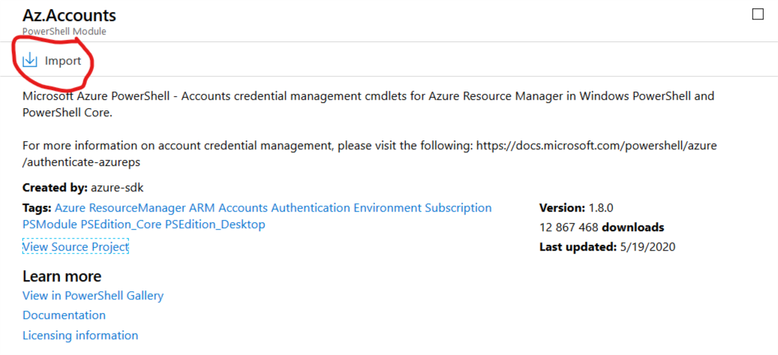
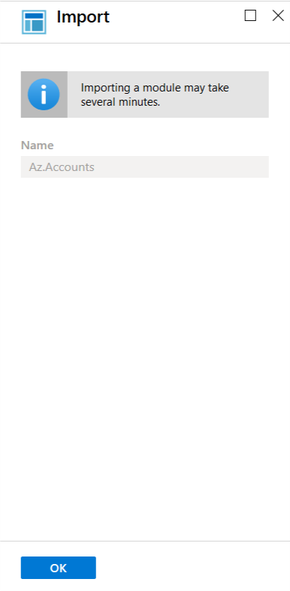
В свойствах созданного объекта Automation account необходимо перейти в раздел подключаемых модулей Modules и установить новые модули из галереи Browse gallery.
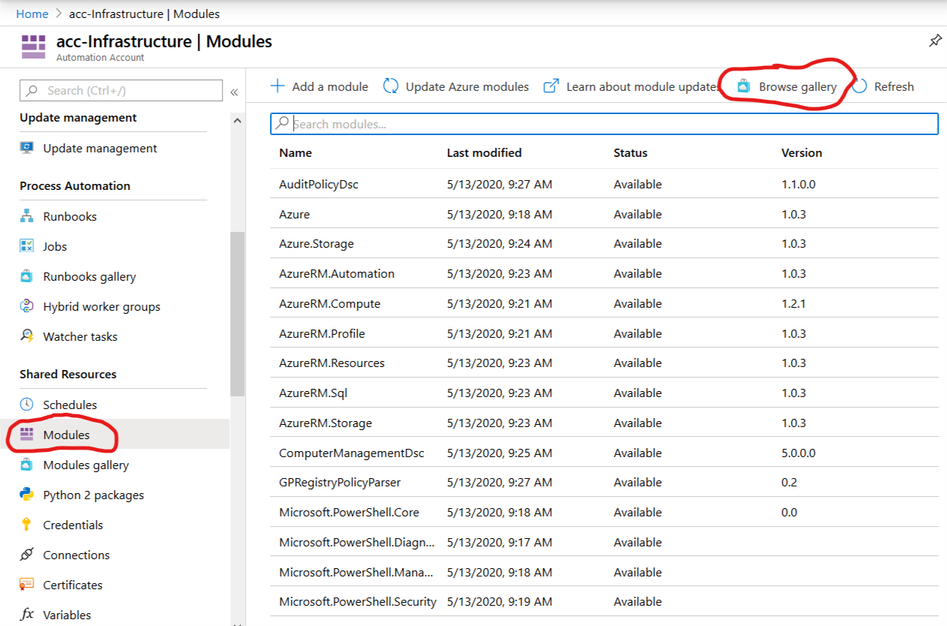
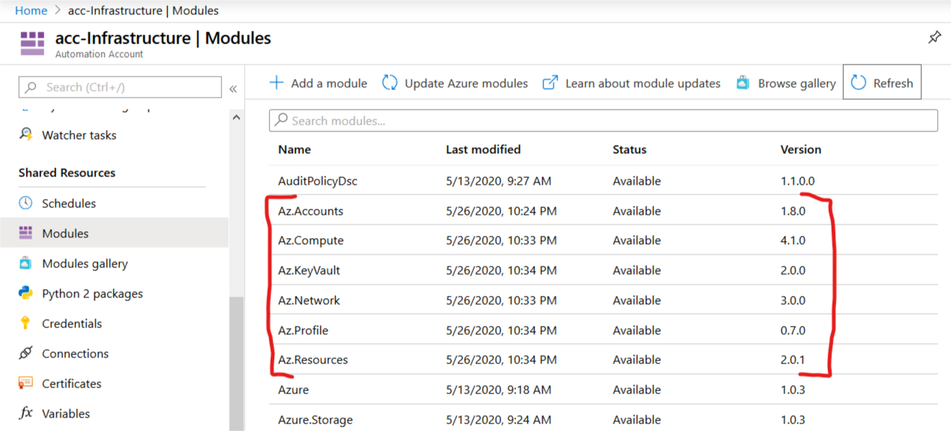
Модули используются для правильной обработки команд PowerShell, которые обращаются к объектам Azure. Список модулей, которые необходимо установить:
- Az.Accounts
- Az.Compute
- Az.KeyVault
- Az.Network
- Az.Profile
- Az.Resources
В конечном итоге раздел Modules должен выглядеть вот так:
Служебная учетная запись Automation создана. Теперь можно переходить к созданию учетной записи SendGrid.
SendGrid - это специальный сервис Azure, который занимается рассылкой сообщений. Чтобы воспользоваться этим сервисом, необходимо создать учетную запись SendGrid.
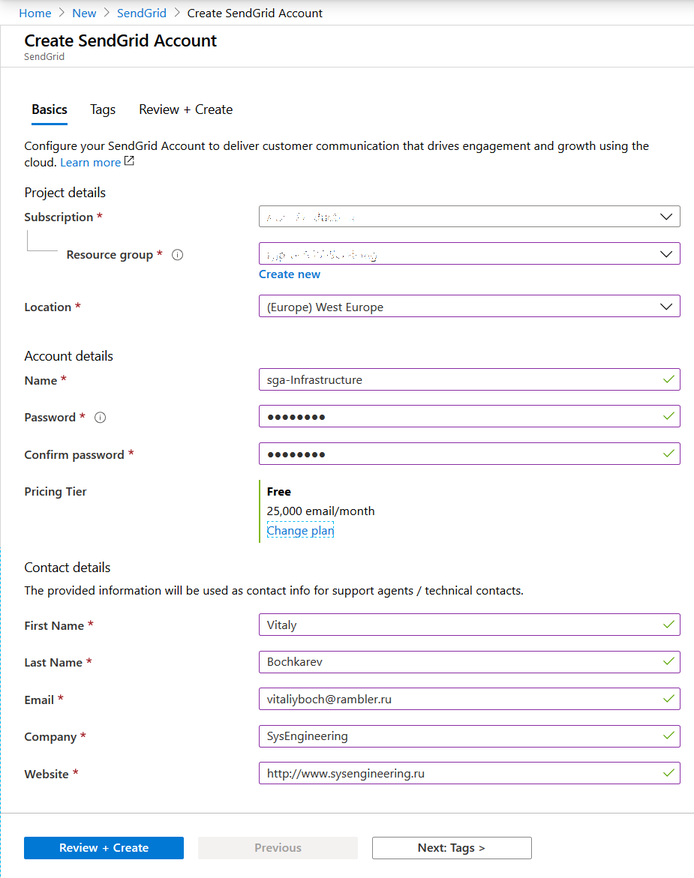
Необходимо создать новый объект SendGrid.
Ввести название, например sga-Infrastructure, подписку, ресурсную группу, датацентр (локацию), пароль к новой учетной записи, тип подписки и заполнить контактные данные. При первом входе в портал SendGrid сервис потребует подтвердить e-mail, который указан в контактных данных.
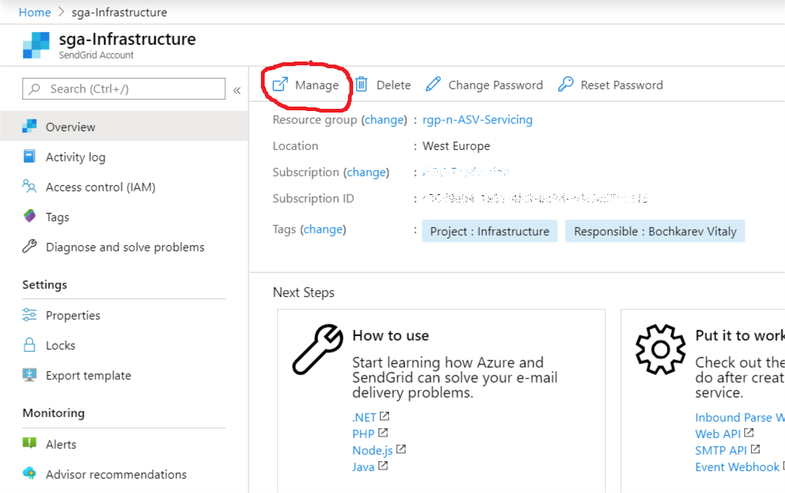
В созданном объекте нажать на кнопку управления Manage, чтобы перейти в портал SendGrid.
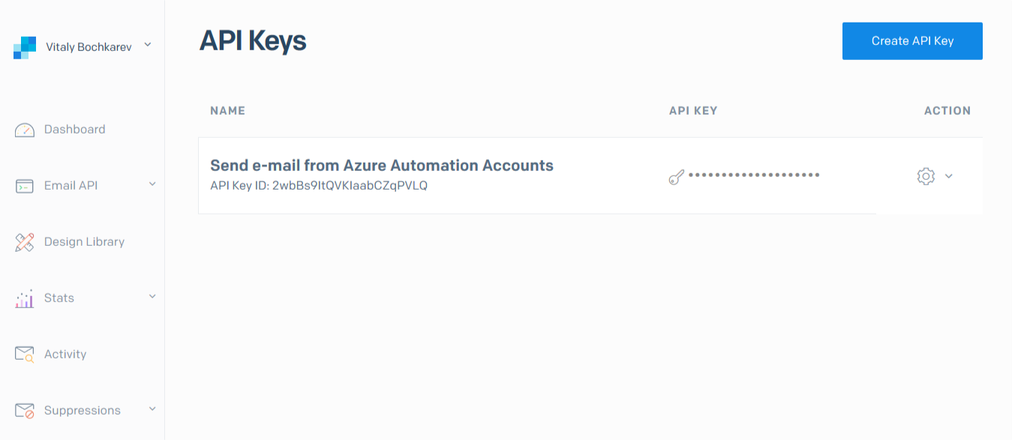
В портале SendGrid перейти в раздел настроек Settings на вкладку API keys и создать новый ключ доступа для API запросов Create API key.
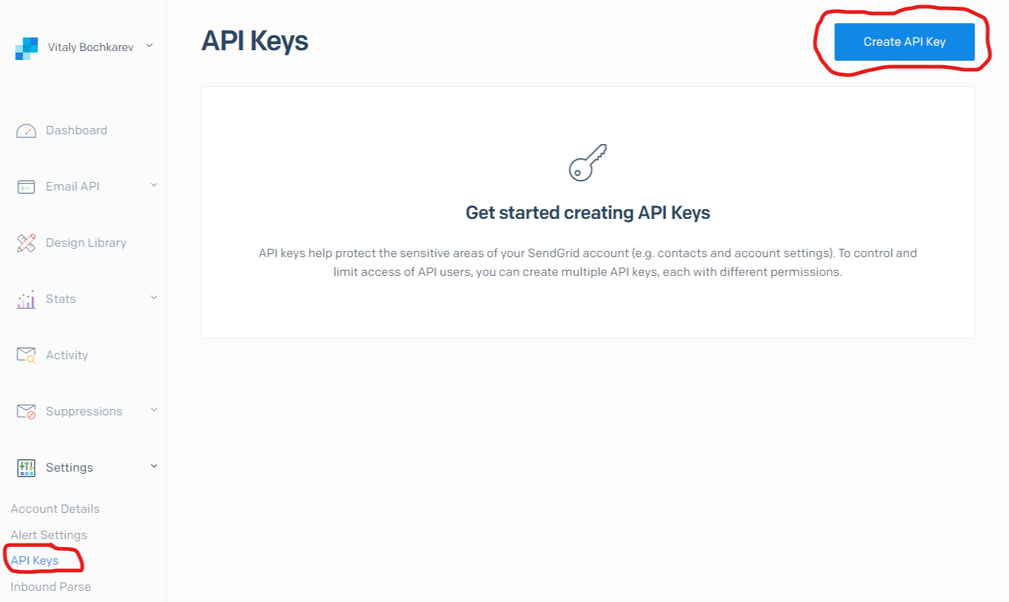
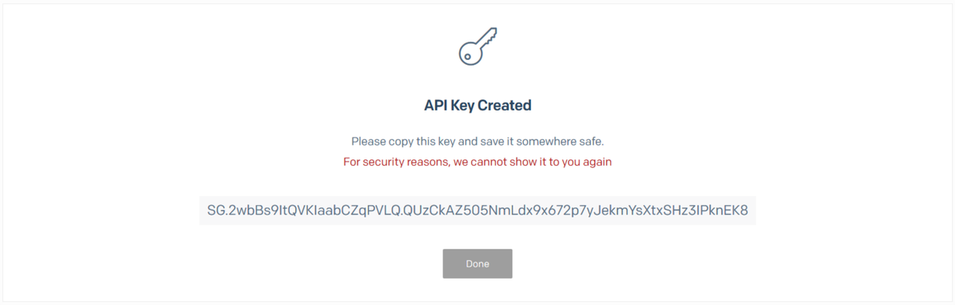
Дать названию новому ключу, например Send e-mail from Azure Automation Account, назначить полные права FullAccess на доступ у функционалу SendGrid и создать ключ.

Скопировать и сохранить полученный пароль к ключу, так как в дальшейшем он показываться не будет. В моем примере это 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.
Скопировать и сохранить идентификатор ключа. В моем примере это 2wbBs9ItQVKIaabCZqPVLQ.
Учетная запись SendGrid создана и готова к использованию.
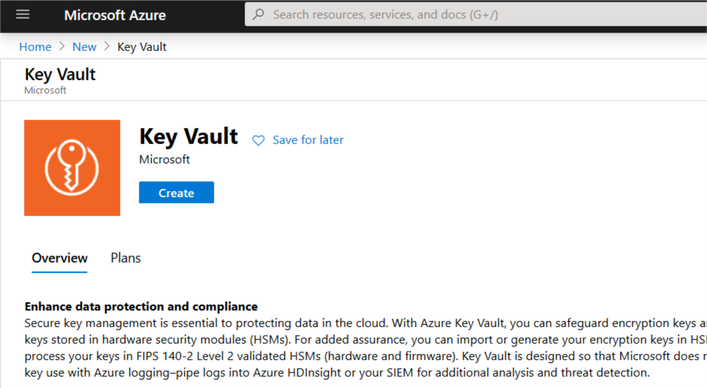
Key Vault - это специальное хранилище паролей, токенов, сертификатов, ключей API и других секретных сведений со строгим контролем доступа к ним.
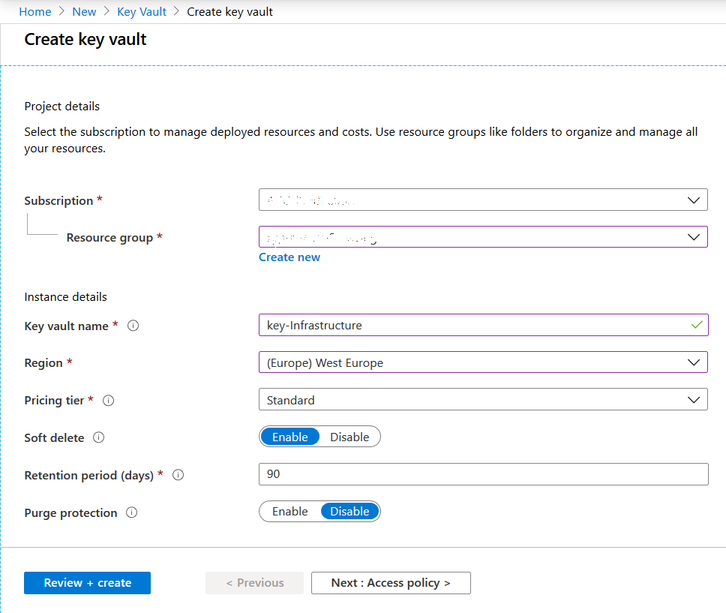
Чтобы воспользоваться сервисом, необходимо создать хранилище ключей Key Vault.
Ввести название, например key-Infrastructure, подписку, ресурсную группу, датацентр (локацию) и прочие параметры.
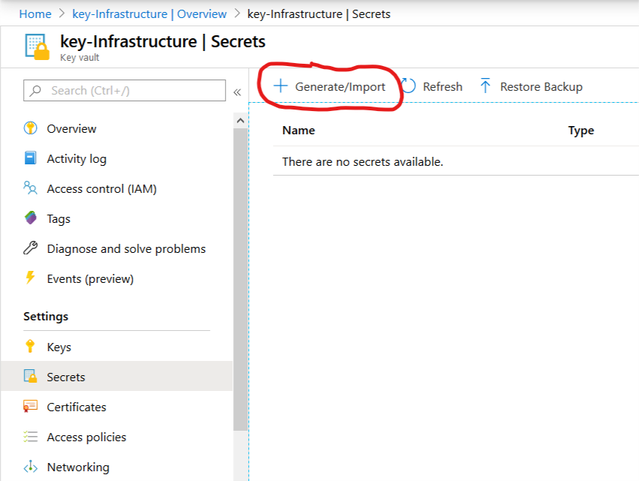
В созданном хранилище ключей перейти в раздел секретов Secrets и создать новую запись.
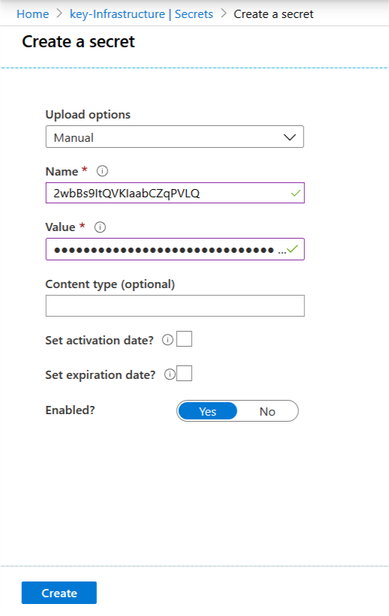
Ввести данные API ключа, полученного в сервисе SendGrid. В моем случае это идентификатор ключа 2wbBs9ItQVKIaabCZqPVLQ и пароль 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. Другие параметры выставлять не нужно.
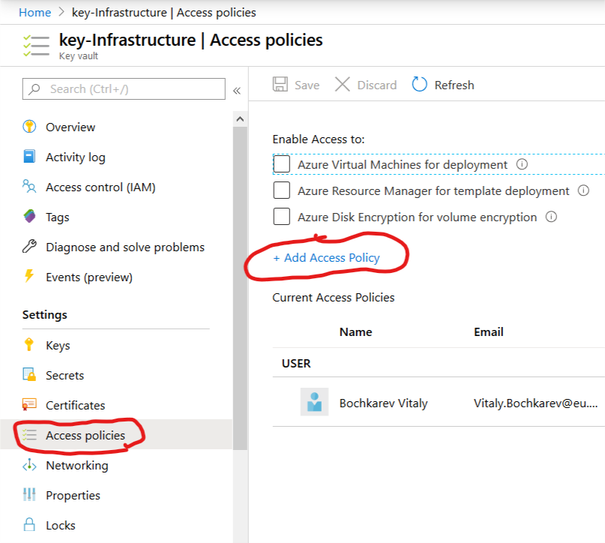
Далее необходимо настроить доступ к хранилищу ключей - выдать учетной записи автоматизации доступ на чтение ключей. Это делается в разделе Access policies.
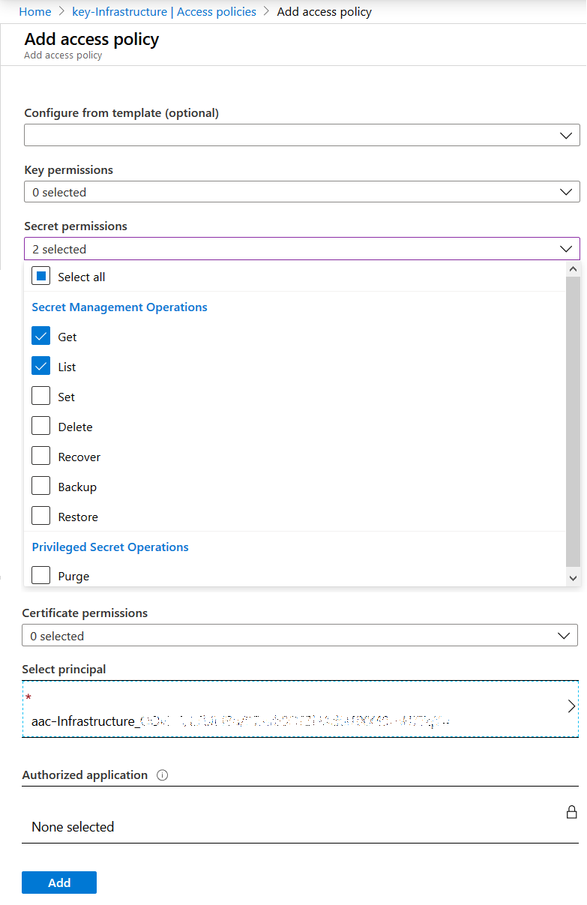
В новой политике доступа необходимо выбрать доступ на чтение List и получение Get к секретам Secret permissions для учетной записи aac-Infrastructure.
Проверить список доступов и сохранить его.
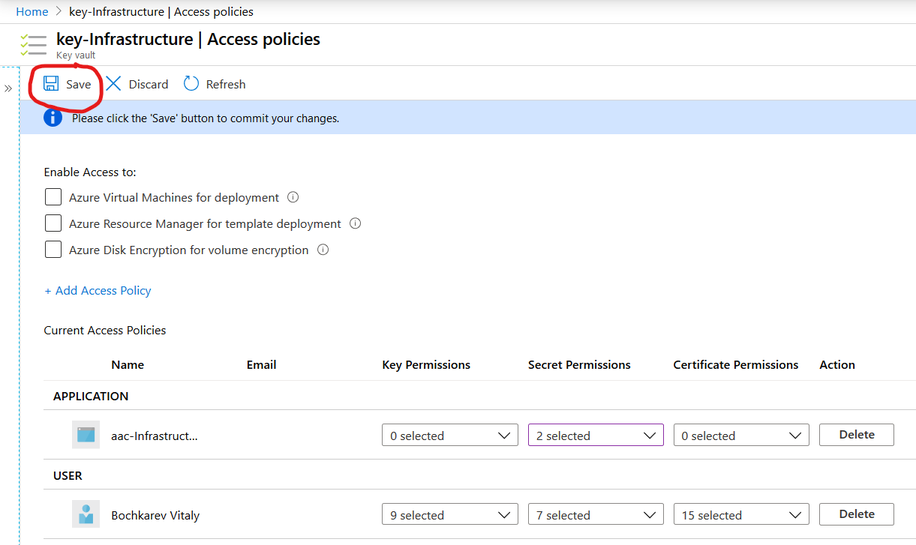
Хранилище ключей готово.
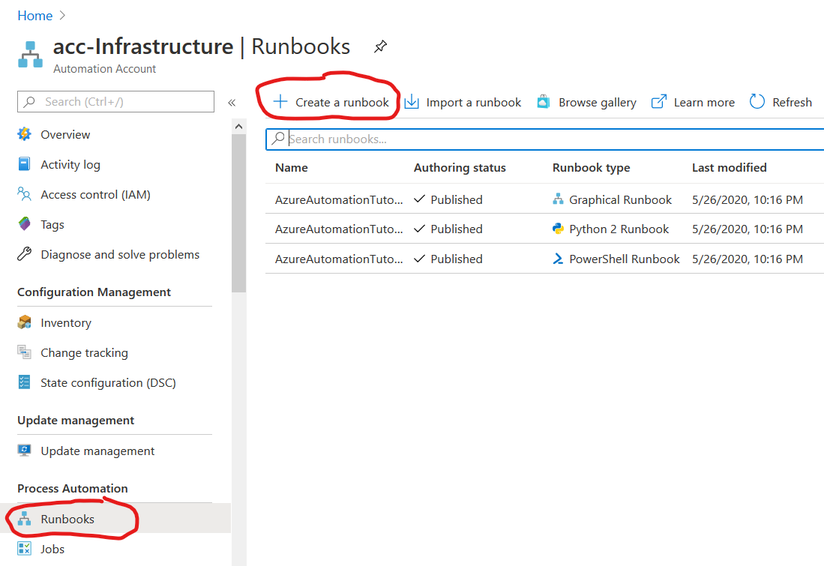
Последним объектом, необходимым для задачи, является книга запуска Runbook, которая хранит в себе скрипт PowerShell и его настройки запуска.
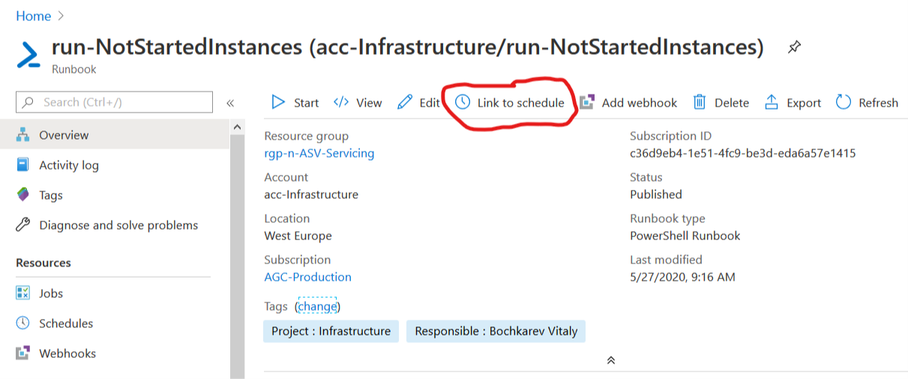
Необходимо открыть созданную ранее учетную запись автоматизации acc-Infrastructure, перейти в раздел книг запуска Runbooks и создать новую книгу.
Ввести имя, например run-NotStartedInstances, и тип скрипта Powershell.
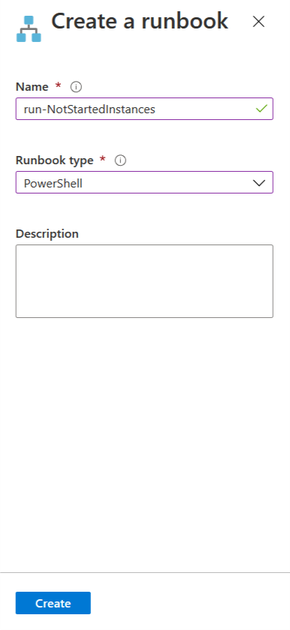
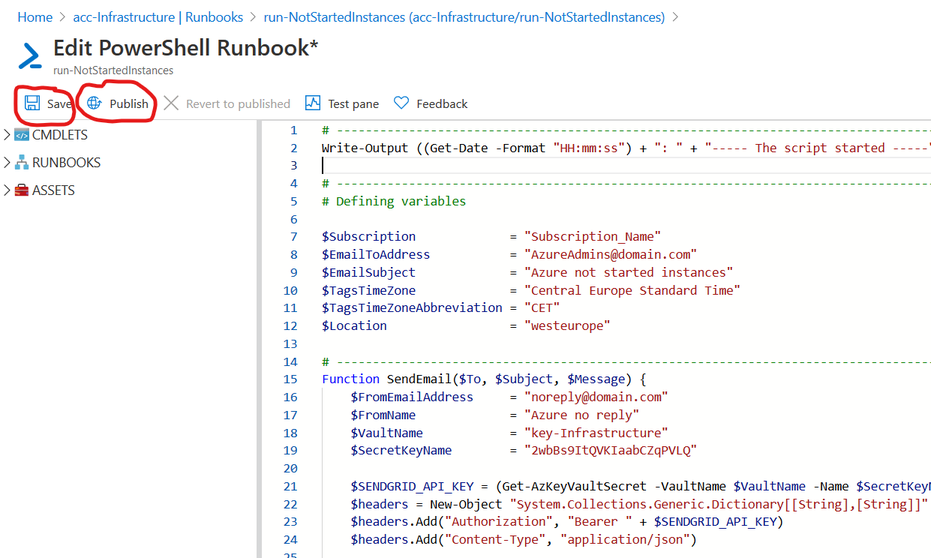
Вставить текст скрипта (приведен ниже), настроить переменные в начале текста скрипта, сохранить и опубликовать книгу запуска.
Связать созданную книгу с расписанием.
Создать новое расписание с именем Run script every hour at 30 min, выставив первое время запуска в 5:30 и повторение каждый час.
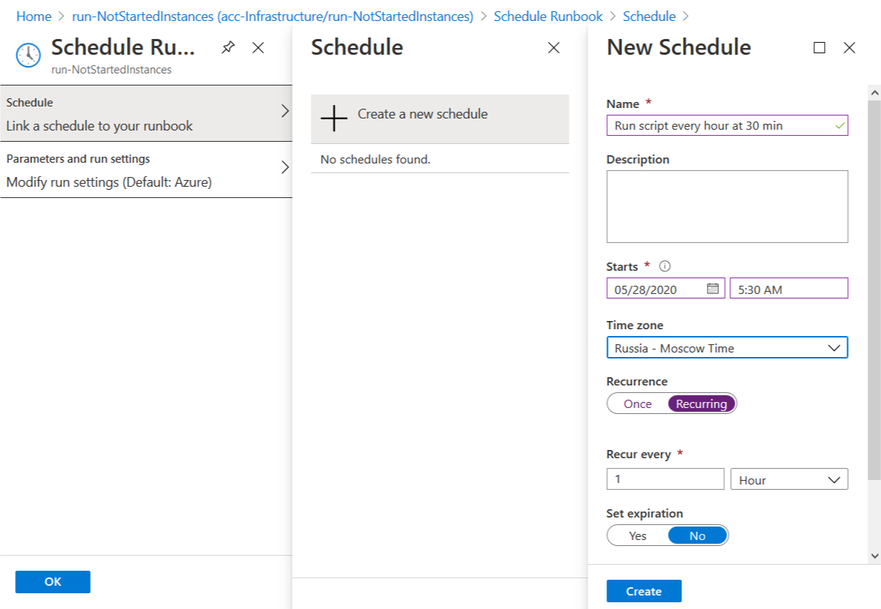
Книга запуска готова.
# ------------------------------------------------------------------------------------------------
Write-Output ((Get-Date -Format "HH:mm:ss") + ": " + "----- The script started -----")

# ------------------------------------------------------------------------------------------------
# Defining variables

$Subscription             = "Subscription_Name"
$EmailToAddress           = "AzureAdmins@domain.com"
$EmailSubject             = "Azure not started instances"
$TagsTimeZone             = "Central Europe Standard Time"
$TagsTimeZoneAbbreviation = "CET"
$Location                 = "westeurope"

# ------------------------------------------------------------------------------------------------
Function SendEmail($To, $Subject, $Message) {
    $FromEmailAddress     = "noreply@domain.com"
    $FromName             = "Azure no reply"
    $VaultName            = "key-Infrastructure"
    $SecretKeyName        = "2wbBs9ItQVKIaabCZqPVLQ"

    $SENDGRID_API_KEY = (Get-AzKeyVaultSecret -VaultName $VaultName -Name $SecretKeyName).SecretValueText
    $headers = New-Object "System.Collections.Generic.Dictionary[[String],[String]]"
    $headers.Add("Authorization", "Bearer " + $SENDGRID_API_KEY)
    $headers.Add("Content-Type", "application/json")

    $EmailBody = @{
        "personalizations" = @(
            @{
                "to"      = @(
                    @{
                        "email" = $To
                    }
                )
                "subject" = $Subject
            }
        )
        "content"          = @(
            @{
                "type"  = "text/html"
                "value" = $Message
            }
        )
        "from"             = @{
            "email" = $FromEmailAddress
            "name"  = $FromName
        }
    }
    $BodyJson = $EmailBody | ConvertTo-Json -Depth 4
    Write-Output ((Get-Date -Format "HH:mm:ss") + ": " + "Sending e-mail to $To")
    Invoke-RestMethod -Uri https://api.sendgrid.com/v3/mail/send -Method Post -Headers $headers -Body $bodyJson | Out-Null
}

# ------------------------------------------------------------------------------------------------
# Logging on to Azure portal
Write-Output ((Get-Date -Format "HH:mm:ss") + ": " + "Logging in to Azure")
$AutoConnection = Get-AutomationConnection -Name AzureRunAsConnection
Connect-AzAccount -ServicePrincipal -Tenant $AutoConnection.TenantID `
   -ApplicationId $AutoConnection.ApplicationID `
   -CertificateThumbprint $AutoConnection.CertificateThumbprint | Out-Null

# ------------------------------------------------------------------------------------------------
# Executing commands in Azure portal

# Making time filter
Write-Output ((Get-Date -Format "HH:mm:ss") + ": " + "System time zone = " + ([TimeZoneInfo]::Local).Id)
Write-Output ((Get-Date -Format "HH:mm:ss") + ": " + "Current system time = " + (Get-Date -Format "dd.MM.yyyy HH:mm, ddd") )
$TagsTime = ([System.TimeZoneInfo]::ConvertTimeBySystemTimeZoneId((Get-Date), $TagsTimeZone)).ToString("dd.MM.yyyy HH:mm, ddd")
Write-Output ((Get-Date -Format "HH:mm:ss") + ": " + "Tags time zone = $($TagsTimeZone)")
Write-Output ((Get-Date -Format "HH:mm:ss") + ": " + "Tags time = $($TagsTime)")
$START_TIME = ([System.TimeZoneInfo]::ConvertTimeBySystemTimeZoneId((Get-Date), $TagsTimeZone)).ToString('H:00')
$START_DAY = ([System.TimeZoneInfo]::ConvertTimeBySystemTimeZoneId((Get-Date), $TagsTimeZone)).ToString('ddd')
Write-Output ((Get-Date -Format "HH:mm:ss") + ": " + "Adapting time to search for ""$($START_TIME)"" in tags")
Write-Output ((Get-Date -Format "HH:mm:ss") + ": " + "Looking for instances where ""Schedule Start"" tag = ""$($START_TIME)"" ...")
[array]$VMs = Get-AzVm -Location $Location | Where-Object {$PSItem.Tags["Schedule Start"] -eq $START_TIME}
Write-Output ((Get-Date -Format "HH:mm:ss") + ": " + "$($VMs.Count) instances found")
Write-Output ((Get-Date -Format "HH:mm:ss") + ": " + "Processing the instances...")
$FoundFlag = $false
ForEach ($VM in $VMs) {
    Write-Output ((Get-Date -Format "HH:mm:ss") + ": " + "$($VM.Name) instance in $($VM.ResourceGroupName) resource group:")
    $VMTags = $VM.Tags
    Write-Output ((Get-Date -Format "HH:mm:ss") + ": " + "  Checking the ""Schedule Days"" tag ...")
    If ( -not($VMTags.Keys -contains "Schedule Days") -or $VMTags["Schedule Days"].Split(',').Trim() -contains $START_DAY ) {
        Write-Output ((Get-Date -Format "HH:mm:ss") + ": " + "  The instance is allowed to be processed today" )
        Write-Output ((Get-Date -Format "HH:mm:ss") + ": " + "  Checking the instance status ...")
        $VMStatus = (Get-AzVM -ResourceGroupName $vm.ResourceGroupName -Name $vm.Name -Status).Statuses[1].DisplayStatus
        If ($VMStatus -ne "VM running") {
            $FoundFlag = $true
            Write-Output ((Get-Date -Format "HH:mm:ss") + ": " + "  The instance is in ""$($VMStatus)"" state")
            Write-Output ((Get-Date -Format "HH:mm:ss") + ": " + "  The instance name is added into the report")
            $FoundServers += "- " + [string]$vm.Name + " (" + $VM.Tags["Description"] + ")</br>"

            Write-Output ((Get-Date -Format "HH:mm:ss") + ": " + "  Starting the instance")
            Start-AzVM -Name $VM.Name -ResourceGroupName $VM.ResourceGroupName -AsJob | Out-Null

            Write-Output ((Get-Date -Format "HH:mm:ss") + ": " + "  Updating COMMENT tag for the instance")
            $VMTagCommentText = ("Started by Status Checker at " + `
              ([System.TimeZoneInfo]::ConvertTimeBySystemTimeZoneId((Get-Date), $TagsTimeZone)).ToString("dd.MM.yyyy HH:mm") + `
              " $($TagsTimeZoneAbbreviation)")

            If (-not($VMTags.ContainsKey("Comment"))) {
                $VMTags.Add("Comment", $VMTagCommentText)
            } Else {
                $VMTags["Comment"] = $VMTagCommentText
            }
            Set-AzResource -ResourceGroupName $VM.ResourceGroupName -Name $VM.Name -ResourceType "Microsoft.Compute/VirtualMachines" `
            -Tag $VMTags -Force -AsJob | Out-Null
       } Else {
            Write-Output ((Get-Date -Format "HH:mm:ss") + ": " + "  The instance is in ""$($VMStatus)"" state")
            Write-Output ((Get-Date -Format "HH:mm:ss") + ": " + "  No action needed")
        }
    } Else {
        Write-Output ((Get-Date -Format "HH:mm:ss") + ": " + "  The instance is not allowed to be processed today" )
    }
}

If ($FoundFlag -eq $true) {
  $Report = ""
  $Report += "<body style=""font-family: Consolas, 'Courier New', monospace; font-size: 10pt;"">"
  $Report += "<h2>Report for $Subscription subscription</h2>"
  $Report += "<h3>Not started instances:</h3>"
  $Report += "<div>" + $FoundServers + "</div>"
  $Report += "</br>"
  $Report += "<div>The mentioned instances were not started after sending the <i>Start-Stop Scheduler</i> start command.</br>"
  $Report += "The <i>Status Checker</i> tried to start the instances again.</div>"
  $Report += "</br>"
  $Report += "<div style=""color: Red;""><b>Please login to the Azure portal and check the instances states.</b></div>"
  $Report += "</body>"
  SendEmail -To $EmailToAddress -Subject $EmailSubject -Message $Report
}

Write-Output ((Get-Date -Format "HH:mm:ss") + ": " + "----- The script stopped -----")

Write-Output (Get-Job)
Если скрипт находит незапущенный сервер, то он пытается запустить его и отправляет письмо администраторам, что необходимо проконтролировать процесс.